Defining The Headers
This section demonstrates how to define custom headers in a P4 program. It also shows how to use constants and typedefs to make the program more readable.
VS Code will be used as the editor to write and inspect the codes. It highlights the syntax of P4 and provides an integrated terminal where the P4 compiler will be invoked. The P4 compiler that will be used is p4c-dpdk, which transforms the P4 code into the specifications file to be executed next into the DPDK pipeline.
Loading the programming environment
Step 1. Launch a Linux terminal by clicking on the Linux terminal icon in the taskbar.

Figure 7. Linux terminal icon.
The Linux terminal is a program that opens a window and permits you to interact with a command-line interface (CLI). A CLI is a program that takes commands from the keyboard and sends them to the operating system for execution.
Step 2. In the terminal, type the command below. This command launches the VS Code and opens the directory where the P4 program for this lab is located.:
code P4DPDK_labs/lab3

Figure 8. Loading VS Code in the lab3 directory.
Defining headers in the headers.p4 file
Step 1. Click on the headers.p4 file to display the contents of the file. Use the file explorer on the left-hand side of the screen to locate the file.

Figure 9. Inspecting the headers.p4 file.
We can see that the headers.p4 is empty and we have to fill it.
Step 2. We will start by defining some typedefs. Write the following in the headers.p4 file.:
typedef bit<48> EthernetAddress;
typedef bit<32> IP4Address;
const bit<16> TYPE_IPV4 = 0x0800;
const bit<8> TYPE_TCP = 6;

Figure 10. Data types and constant definitions.
In the figure above the typedef declaration used (lines 2 - 5) is used to assign alternative names
to types. Here we are saying that EthernetAddress can be used instead of bit<48> and IP4Address
instead of bit<32>. We will use this typedef when defining the headers. Lines 4 and 5 show how to
define constants with the name TYPE_IPV4 set to a value of 0x800 and the name TYPE_TCP set to a
value of 6. We will use these values in the parser implementation.
Step 3. Now we will define the Ethernet header. Add the following code to the headers.p4 file.:
header ethernet_t {
EthernetAddress dstAddr;
EthernetAddress srcAddr;
bit<16> etherType; }

Figure 11. Adding the Ethernet header definition.
Note how we used the typedef EthernetAddress which corresponds to bit<48> when defining the destination
MAC address field (dstAddr) and the source MAC address field (srcAddr). Note how we are mapping the
fields to those defined in the standard Ethernet header (see Figure 1).
Step 4. Now we will define the IPv4 header. Add the following code to the headers.p4 file.:
header ipv4_t {
bit<4> version;
bit<4> ihl;
bit<8> diffserv;
bit<16> totalLen;
bit<16> identification;
bit<3> flags;
bit<13> fragOffset;
bit<8> ttl;
bit<8> protocol;
bit<16> hdrChecksum;
IP4Address srcAddr;
IP4Address dstAddr; }
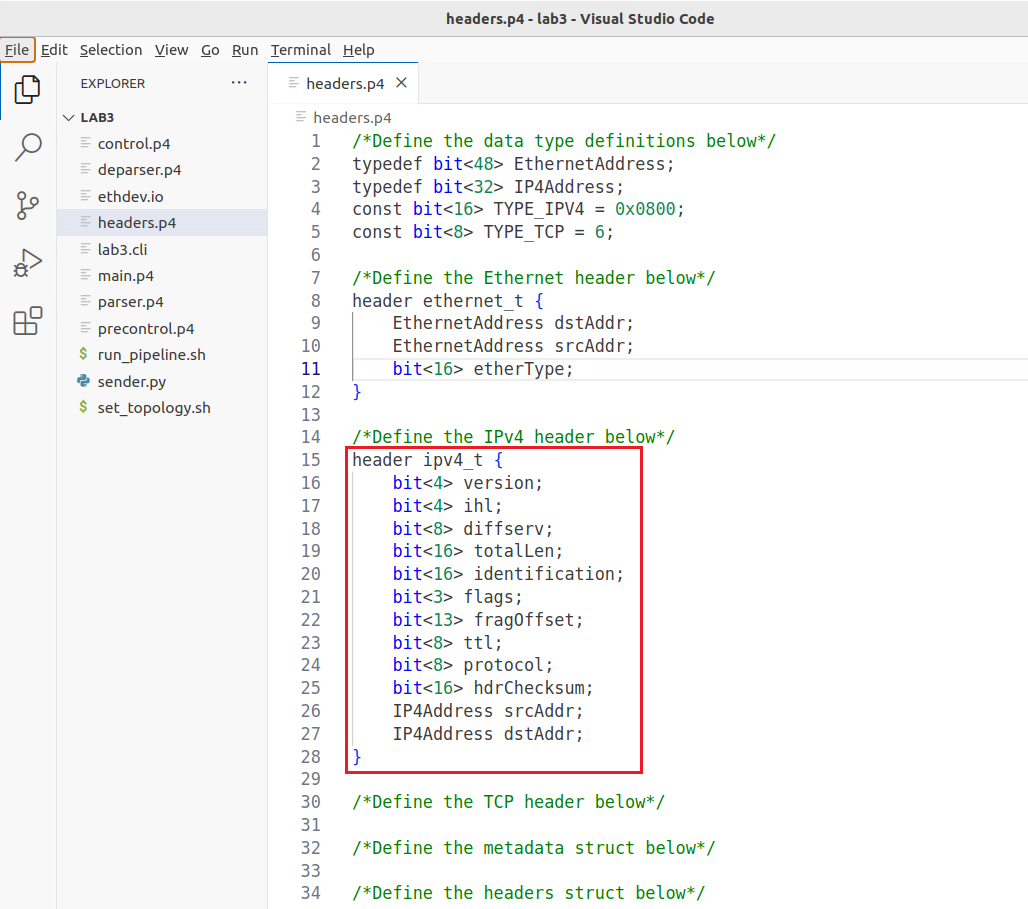
Figure 12. Adding the IPv4 header definition.
Consider the figure above. Note how we used the typedef IP4Address which corresponds to bit<32> when defining the
source IP address field (srcAddr) and the destination IP address field (dstAddr). Also, note how we are mapping the
fields to those defined in the standard IPv4 header (see Figure 2).
Step 5. Now we will define the TCP header. Add the following code to the headers.p4 file.:
header tcp_t {
bit<16> srcPort;
bit<16> dstPort;
bit<32> seqNo;
bit<32> ackNo;
bit<4> dataOffset;
bit<3> res;
bit<3> ecn;
bit<6> ctrl;
bit<16> window;
bit<16> checksum;
bit<16> urgentPtr; }
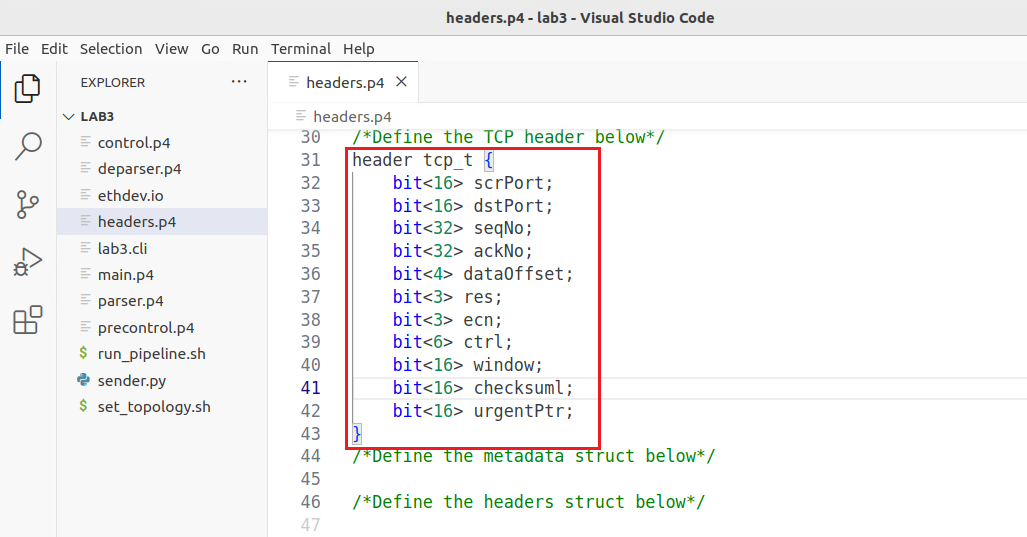
Figure 13. Adding the TCP header definition.
Consider the figure above. Note how we are mapping the fields to those defined in the standard TCP header (see Figure 3). The Flags field which is usually represented in 9 bits is split into two: Explicit Congestion Notification Flags (ecn) represented by 3 bits and the Control Flags (ctrl) represented by 6 bits.
Step 6. Now we will create a struct to represent our metadata. Metadata is passed from one block to another as the packet propagates through the architecture. For simplicity, this program does not require any user metadata, and hence we will define it as empty with no fields. Add the following to the headers.p4 file.:
struct metadata {
/* empty */
}
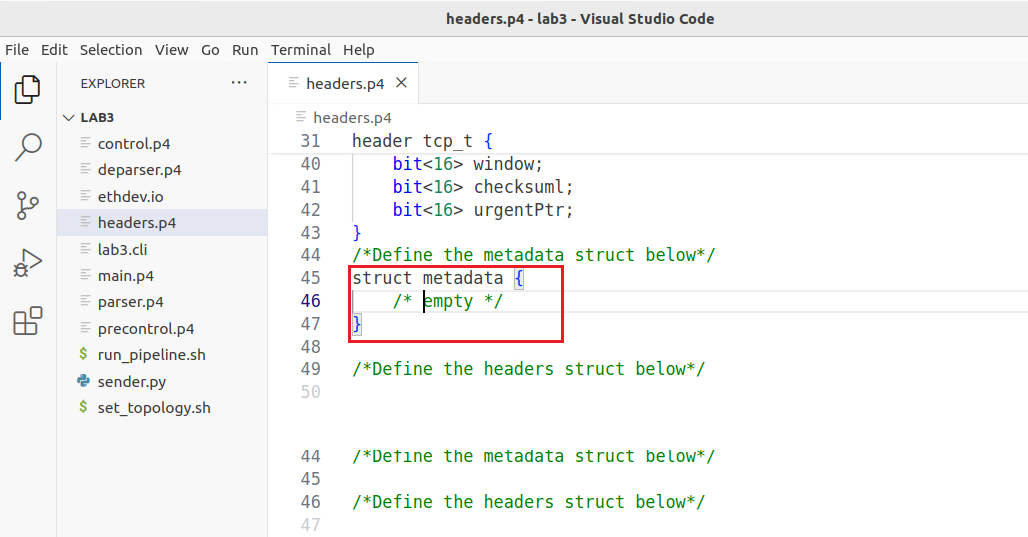
Figure 14. Adding the metadata structures.
Step 7. Now we will create a structure (struct) to contain our headers (Ethernet, IPv4, and TCP). Append the following code to the headers.p4 file.
struct headers { ethernet_t ethernet; ipv4_t ipv4; tcp_t tcp;}
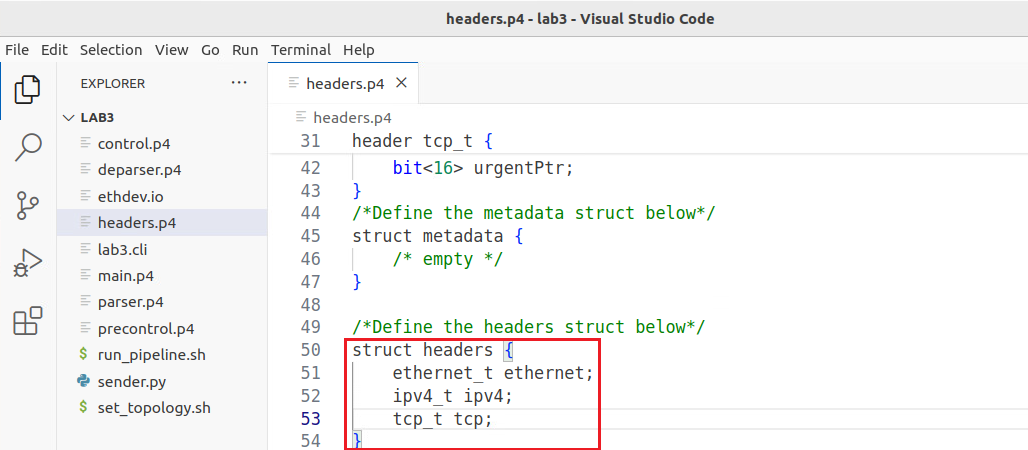
Figure 15. Appending the headers’ data structure to the headers.p4 file.
Step 8. Save the changes by pressing Ctrl+s.